
Disclosure: GearSift is reader-supported. We research every pick, and no brand pays to be included. This article contains no affiliate links. How we make money
Jellyfin is a free media server you run yourself, and Docker Compose is a short way to run it on a Linux machine: one compose file, one command to start it, then a setup wizard in your browser [1][9][20]. This guide gives the full file, explains every line, walks through the wizard, and covers the parts that cause trouble later: permissions, updates, backups and keeping the server off the open internet.
How we researched this: we followed Jellyfin’s, Docker’s and Podman’s official documentation and checked every command and setting against it. The steps were run once in a recorded demo on a Linux test machine, described below. We have not tested hardware transcoding, any GPU or any NAS, and nothing here is a product review.
If you prefer to watch, the video below follows the same steps from the recorded demo.
The short answer
- Create a folder for your media and two folders for Jellyfin’s own files.
- Save the compose file below, unchanged apart from your own folder paths.
- Run
docker compose up -din the folder that holds the file [3]. - Open port 8096 on that machine in a browser and follow the setup wizard [9][13].
What the demo used
The demo for this guide was recorded on rootless Podman 6.1.4, not Docker Engine [22]. Podman is a daemonless container tool whose command line will be familiar to Docker users [21]. The demo ran the compose file below through a small docker wrapper script and podman-compose 1.6.0, so the commands run in the demo were the Docker ones, but Podman ran them. We have not run this file on Docker Engine. The demo is a screen recording made while preparing this guide.
Other facts about the demo:
- The server was Jellyfin 12.4.0, started from the
latestimage [1]. - The test machine had no GPU, so hardware acceleration stayed off (set to None).
- The only media was the Blender Foundation’s open movies, which carry a Creative Commons licence (credits at the end of this guide).
- The login and the library were created for the demo and hold no personal data.
Podman’s own documentation says: “Most users can simply alias Docker to Podman (alias docker=podman) without any problems.” [21] It also says containers “can either be run by root or by a non-privileged user” [21]. Jellyfin has a separate Podman section in its install guide, and it differs from the Docker steps in three places that matter here [1]:
- Rootless Podman: Jellyfin says opening ports in your firewall “is not done automatically when using rootless Podman.” [1]
- Permissions: Jellyfin’s Podman example adds
--userns keep-idso that file permissions on mounted folders map correctly between the host user and the user inside the container [1]. - SELinux: the Podman example adds the
Zvolume option (orrelabel=private) so Podman relabels files on systems running SELinux [1]. The compose file below has neither, and we have not tested it on an SELinux system. If Jellyfin cannot read your folders on such a system, read that section of the install guide.
If you run Docker Engine, use the Docker steps in Jellyfin’s guide [1] and the Compose commands in this article [3][4]. Output formatting can differ between engines; in the demo, docker ps printed the image with its full registry name (docker.io/jellyfin/jellyfin:latest), which is how Podman printed it.
What you need
- A Linux machine that stays on. Jellyfin supports its container images on Linux. For Windows or macOS it says to install Jellyfin natively, because running it in a container there is “NOT supported” and hardware-accelerated transcoding is one of the features known to be broken [1].
- Docker Engine with the Compose plugin (or Docker Desktop, which includes Compose) [7]. Podman works as described above [21].
- Media files you are allowed to play. The demo used only openly licensed films.
- A browser on the same network.
Step 1: Create the folders
Keep your media in one place and Jellyfin’s own files in another. Jellyfin’s install guide has you create two folders for configuration and cache data, which it calls persistent storage [1]. The demo used these paths:
/srv/media/movies: your movies, one folder per title/srv/jellyfin/config: Jellyfin’s settings and database/srv/jellyfin/cache: Jellyfin’s cache
mkdir -p /srv/media/movies /srv/jellyfin/config /srv/jellyfin/cache
If your account can’t create folders under /srv, add sudo or use other paths. Any paths work as long as the three paths in the compose file match them.
Name movies the way Jellyfin expects. Each movie goes in its own folder, and the folder is named “Movie Name (year)”; the year is optional but “will help identify media more reliably.” The video file inside has the same name as its folder [11]:
/srv/media/movies/Example Movie (2020)/Example Movie (2020).mkv
Jellyfin says certain characters are reserved and “WILL cause problems”: <, >, :, ", /, \, |, ? and * [11]. TV shows use a different layout, covered in the FAQ.
Step 2: The compose file
Save this as compose.yaml in /srv/jellyfin. Compose’s default file name is compose.yaml, and it looks for it in the folder you run the command from [8]. This is the file used in the demo:
services:
  jellyfin:
    image: jellyfin/jellyfin:latest
    container_name: jellyfin
    restart: unless-stopped
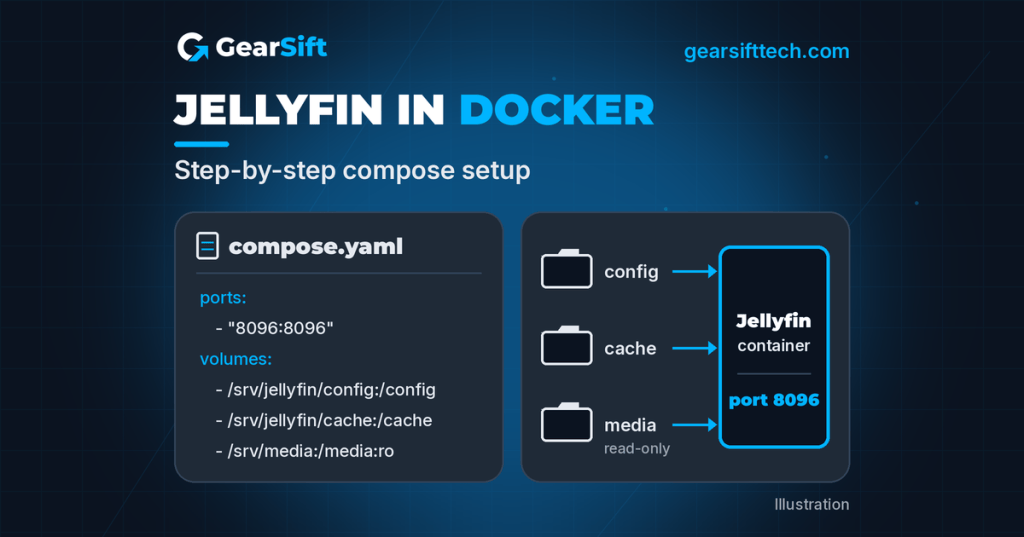
    ports:
      - "8096:8096"
    volumes:
      - /srv/jellyfin/config:/config
      - /srv/jellyfin/cache:/cache
      - /srv/media:/media:ro
    # Intel/AMD GPU transcoding (optional, if your server has /dev/dri):
    # devices:
    #   - /dev/dri:/dev/dri
What each part does:
| Line | What it does |
|---|---|
image: jellyfin/jellyfin:latest | Jellyfin’s official image on Docker Hub [1]. Jellyfin says latest “always tracks the latest stable release, including through major and minor version bumps” [1]. See “Updating” below for pinning a version. |
container_name: jellyfin | Gives the container a fixed name instead of a generated one [2]. The commands below use this name. |
restart: unless-stopped | Restarts the container whatever its exit code, until you stop or remove it [2]. In practice it comes back after a reboot unless you stopped it yourself (our reading of the policy). |
"8096:8096" | Publishes port 8096 on the host to port 8096 in the container, written as HOST:CONTAINER [2]. 8096/TCP is Jellyfin’s default HTTP port [13]. Read the port warning below. |
/srv/jellyfin/config:/config and /srv/jellyfin/cache:/cache | Two host folders mounted into the container for configuration and cache data [1]. Because they live on the host, they survive the container being recreated [3]. |
/srv/media:/media:ro | Your media folder, mounted at /media inside the container. ro means read-only access [2]. Jellyfin can read your files but not change or delete them. Our inference: anything Jellyfin would save next to a movie, such as extra files like local artwork or .nfo files that its Movies guide lists as optional [11], cannot be written there. |
The commented devices lines | Off by default. If you remove the # marks, the line maps /dev/dri from the host into the container, in the Compose form HOST_PATH:CONTAINER_PATH [2]. See the hardware acceleration section before you do. |
Port warning. Docker’s reference says that if you don’t give a host IP in a port mapping, Docker “binds to all interfaces (0.0.0.0), bypassing host firewall rules. This can expose the container directly to the internet if the host has a public IP address.” [2] The file above has no host IP, so treat port 8096 as reachable from anything that can reach the machine, and see “Keep it healthy” below.
Other things the file doesn’t do. It has no user: line. Jellyfin’s own compose example marks user as optional, “specify the uid and gid you would like Jellyfin to use instead of root” [1], so with this file the container runs as its default user. It publishes only port 8096. Jellyfin lists 7359/UDP for client discovery on the local network [13] and says host networking is “required in order to use DLNA” [1]. Our inference: with this file, apps that rely on automatic discovery may need the server address typed in. We have not tested discovery.
Step 3: Start it
From the folder that holds the file:
cd /srv/jellyfin
docker compose up -d
-d runs the containers in the background [3]. If the image isn’t on the machine yet, Compose pulls it first [2], so the first start takes longer. Then check:
docker ps
docker logs jellyfin
docker ps lists running containers [6], and docker logs prints a container’s log output [5]. In the demo, docker ps showed the container as Up Less than a second (starting), and a log filter showed the lines Jellyfin version: 12.4.0 and Startup complete. Your own docker logs jellyfin will show many more lines.
Step 4: The setup wizard
Open http://<your-server-address>:8096 in a browser, using the machine’s address on your network. The wizard walks through these pages [9]:
- Language. Jellyfin says this setting “only affects the client you are using.”
- Administrator account. “Choose a strong password for better security.” This account manages the whole server.
- Media libraries. Click + to add a library, choose a Content Type (Movies for this guide) and a Display Name, then add folders with +. The folder picker lets you select folders visually or enter a path manually [10]. Browse to /media/movies: that is the path inside the container, from the
/srv/media:/media:roline (our reading of the volume mapping). If you don’t see your folders, Jellyfin says “you might have permission issues.” [9] - Metadata language. Pick a preferred language and region for metadata; Jellyfin may fetch other languages if yours isn’t available [9].
- Networking. Jellyfin says “For most users, it is recommended to enable the “Allow remote access to this server” option.” It also recommends turning off automatic port mapping unless you specifically need it, because that option “relies on UPnP, a protocol commonly associated with security concerns” [9]. Whether to allow remote access is your call; read “Keep it healthy” below first.
One library setting in the demo is not a default. The demo’s library had its internet metadata downloaders switched off, to keep the demo fully local. Jellyfin says it normally “will load metadata from various Providers” [13], so for a normal library leave the defaults.
Finish the wizard and sign in.
Step 5: First playback and Playback Info
Open a movie and press play. Jellyfin names four kinds of playback, from lowest to highest load: Direct Play, Remux, Direct Stream and Transcode. Jellyfin describes Direct Play as: “Delivers the file without transcoding. There is no modification to the file and almost no additional load on the server.” Transcode is: “Transcodes the video stream.” [14] In the demo, the player’s Playback Info panel showed Direct playing. Forcing a lower bitrate in the player’s quality menu switched it to Transcoding, with the reason shown as the video’s bitrate exceeding the limit, and the demo machine did that in software on the CPU.
Hardware acceleration: what Jellyfin’s docs say
We did not test hardware transcoding. Everything in this section comes from Jellyfin’s documentation, and the demo machine had no GPU.
- Jellyfin lists these supported and validated methods: Intel Quick Sync Video (QSV), NVIDIA NVDEC/NVENC, AMD AMF, Intel/AMD VA-API (Linux only), Apple VideoToolbox (macOS only) and Rockchip RKMPP (Linux only) [15].
- Its table for Linux picks QSV for Intel, VAAPI for AMD and NVENC for Nvidia [15]. It gives this command to list your GPU on Linux:
lspci -nn | grep -Ei "3d|display|vga"[15]. - Container support is Linux-only: Jellyfin says hardware-accelerated transcoding is known to be broken when running in a container on other platforms [1].
- Each vendor has its own page: Intel [16], AMD [17] and NVIDIA [18].
The commented lines in our compose file pass the whole /dev/dri folder to the container. Jellyfin’s Intel page does it differently in its Docker example: it passes one render device, /dev/dri/renderD128, and also adds the host’s render group ID with group_add, which you look up on your machine [16]. Our file has neither group_add nor the single-device form, and we haven’t tested either on a GPU. If you want hardware transcoding, follow the page for your GPU, then choose the matching option on the Transcoding page of the dashboard’s Playback section [16]. Jellyfin’s Intel page ends its Docker steps with “Enable QSV or VA-API in Jellyfin and uncheck the unsupported codecs.” [16]
Keep it healthy
Don’t expose port 8096 straight to the internet. Jellyfin’s networking guide says “Opening a port directly to the Internet is therefore insecure and not recommended,” and lists “forwarding its Ports directly to the internet (not recommended!)” as one way to expose it, next to a reverse proxy and a VPN connection [13]. It also says that “you must manually expose it to the internet” [13] and “Using https to access the Server is recommended” [13]. Remote access can be disabled completely or enabled per user [13]. For viewing away from home, use a VPN to enter your network, or put a reverse proxy with HTTPS in front [13].
Back up before you update. Jellyfin says it “does not have a downgrade mechanism”: once a new version has started, migrations are applied and your data “will no longer work with the old version,” and the way back is a backup [19]. Jellyfin has a built-in backup, available since 10.11, under the dashboard’s Backups tab. In the official Docker image its backups go to <volume path>/config/data/backups, where the volume path is the folder behind your /config volume, /srv/jellyfin/config here [19]. The manual route is to stop the server first, which Jellyfin calls “extremely important, as otherwise the database will be locked and might not be recoverable when restoring” [19]. Its Docker command is docker stop jellyfin, and the data directory is wherever your /config volume is sourced from [19]. Copy that folder, then start the container again. Back up your media separately; the compose file mounts it read-only and Jellyfin doesn’t back it up.
Updating. Pull the new image, then recreate the container:
cd /srv/jellyfin
docker compose pull
docker compose up -d
docker compose pull pulls the service images [4]. If a service’s image has changed since the container was created, docker compose up “picks up the changes by stopping and recreating the containers (preserving mounted volumes)” [3]. Your settings stay because they live in the config folder, not in the container [1][3]. Because the file uses latest, an update can cross a major version [1], so take a backup first. Jellyfin also publishes tags for a major version, a minor version or one exact release [1]. We don’t show a changed file, but if you want to pin a version, those are the tag forms to look at.
If something doesn’t work
- Jellyfin can’t see your files. Check folder permissions, as the wizard page warns [9], and make sure you’re browsing the path inside the container,
/media. On an SELinux system, see the Podman notes above [1]. - The page won’t load. Run
docker psanddocker logs jellyfin[5][6]. With rootless Podman, check your firewall, since Jellyfin says opening ports “is not done automatically” there [1]. - A movie isn’t matched or doesn’t appear. Check the folder and file name against the naming rules above [11], and look for the reserved characters.
- An update went wrong. Restore your backup from the Backups tab, or by copying the data directory back after stopping the server [19].
Quick answers
Do I need Plex?
No. Jellyfin is a separate project. Its About page calls it “an alternative to the proprietary Emby and Plex” and says “There are no strings attached, no premium licenses or features” [20]. If you are still choosing hardware, our budget NAS guide for Plex and Jellyfin covers that.
Can I use a NAS?
If your NAS lets you run Docker Compose projects, the same kind of file applies, but folder paths, user permissions and any container app on the NAS vary by vendor. The demo was not recorded on a NAS, and this guide doesn’t cover any NAS vendor’s own interface. For a NAS that runs Jellyfin in Docker, see our owner’s notes on a UGREEN DXP4800 Plus. They describe one setup and are not a tutorial or a review. For storage background, see NAS vs DAS vs external drive.
Does it work on Podman?
The demo ran on rootless Podman 6.1.4, which Podman’s docs describe as Docker-compatible for most users [21]. Jellyfin’s install guide has its own Podman section with the differences listed above [1].
How do I add TV shows?
Add a library with the Shows content type. Jellyfin’s layout is a series folder, such as “Series Name (2010)”, with a season folder inside it named “Season 01”. It says “Do not abbreviate the Season name to S01 or SE01” and recommends padding season numbers with zeros [12]. The demo library had movies only.
Can I use hardware acceleration in Docker?
Jellyfin documents it for Linux hosts; the steps depend on your GPU [1][15][16]. We did not test it. See the hardware acceleration section above.
Credits and notes on the demo
The demo library used only open movies from the Blender Foundation, licensed under Creative Commons Attribution 3.0 [26]. Only Big Buck Bunny was played in the demo; Sintel and Tears of Steel appeared only as library posters.
- Big Buck Bunny: (c) copyright 2008, Blender Foundation / http://www.bigbuckbunny.org [23]
- Sintel: © copyright Blender Foundation | durian.blender.org [24]
- Tears of Steel: (CC) Blender Foundation | mango.blender.org [25]
Changes: the demo included only an excerpt of Big Buck Bunny, played in the Jellyfin player; the library posters were made by GearSift from film stills.
Jellyfin, Docker and Podman are used here to describe how to use their software. Docker says “Docker and the Docker logo are trademarks or registered trademarks of Docker, Inc. in the United States and/or other countries.” [27] GearSift isn’t affiliated with or endorsed by Jellyfin, Docker or Podman.
How we pick and source information: How we research. More NAS and storage guides: NAS & Storage hub.
Real gear for a better everyday.
Sources (all checked November 4, 2026, ET)
- Jellyfin, “Container” (install guide: images, tags, Docker, Podman) (docs): https://jellyfin.org/docs/general/installation/container/
- Docker, “Services” (Compose file reference) (docs): https://docs.docker.com/reference/compose-file/services/
- Docker, “docker compose up” (docs): https://docs.docker.com/reference/cli/docker/compose/up/
- Docker, “docker compose pull” (docs): https://docs.docker.com/reference/cli/docker/compose/pull/
- Docker, “docker container logs” (docs): https://docs.docker.com/reference/cli/docker/container/logs/
- Docker, “docker container ls” (docs): https://docs.docker.com/reference/cli/docker/container/ls/
- Docker, “Overview of installing Docker Compose” (docs): https://docs.docker.com/compose/install/
- Docker, “How Compose works” (Compose application model, default file name) (docs): https://docs.docker.com/compose/intro/compose-application-model/
- Jellyfin, “Setup Wizard Walkthrough” (docs): https://jellyfin.org/docs/general/post-install/setup-wizard/
- Jellyfin, “Libraries” (docs): https://jellyfin.org/docs/general/server/libraries/
- Jellyfin, “Movies” (docs): https://jellyfin.org/docs/general/server/media/movies/
- Jellyfin, “TV Shows” (docs): https://jellyfin.org/docs/general/server/media/shows/
- Jellyfin, “Networking” (docs): https://jellyfin.org/docs/general/post-install/networking/
- Jellyfin, “Transcoding” (docs): https://jellyfin.org/docs/general/post-install/transcoding/
- Jellyfin, “Hardware Acceleration” (docs): https://jellyfin.org/docs/general/post-install/transcoding/hardware-acceleration/
- Jellyfin, “Intel GPU” hardware acceleration (docs): https://jellyfin.org/docs/general/post-install/transcoding/hardware-acceleration/intel/
- Jellyfin, “AMD GPU” hardware acceleration (docs): https://jellyfin.org/docs/general/post-install/transcoding/hardware-acceleration/amd/
- Jellyfin, “NVIDIA GPU” hardware acceleration (docs): https://jellyfin.org/docs/general/post-install/transcoding/hardware-acceleration/nvidia/
- Jellyfin, “Backup and Restore” (docs): https://jellyfin.org/docs/general/administration/backup-and-restore/
- Jellyfin, “About Jellyfin” (docs): https://jellyfin.org/docs/general/about/
- Podman, “What is Podman?” (docs): https://docs.podman.io/en/latest/
- Podman, releases (version 6.1.4 listed): https://github.com/podman-container-tools/podman/releases
- Blender Foundation, Peach open movie (Big Buck Bunny), About / licence: https://peach.blender.org/about/
- Blender Foundation, Durian open movie (Sintel), Sharing / licence: https://durian.blender.org/sharing/
- Blender Foundation, Mango open movie (Tears of Steel), Sharing / licence: https://mango.blender.org/sharing/
- Creative Commons, Attribution 3.0 Unported licence deed: https://creativecommons.org/licenses/by/3.0/
- Docker, “Trademark Guidelines” (legal): https://www.docker.com/legal/trademark-guidelines/


Leave a Reply